


Portrait Photography Tips: 4 Looks, ONE Light!
Pete uses the following gear: a Fujifilm XT5 camera, 16 to 55 and 35-millimeter 1.4 lenses, Nanlite FS-300, a 36-inch deep parabolic softbox with a grid, two V-flats, and a piece of white poster board.
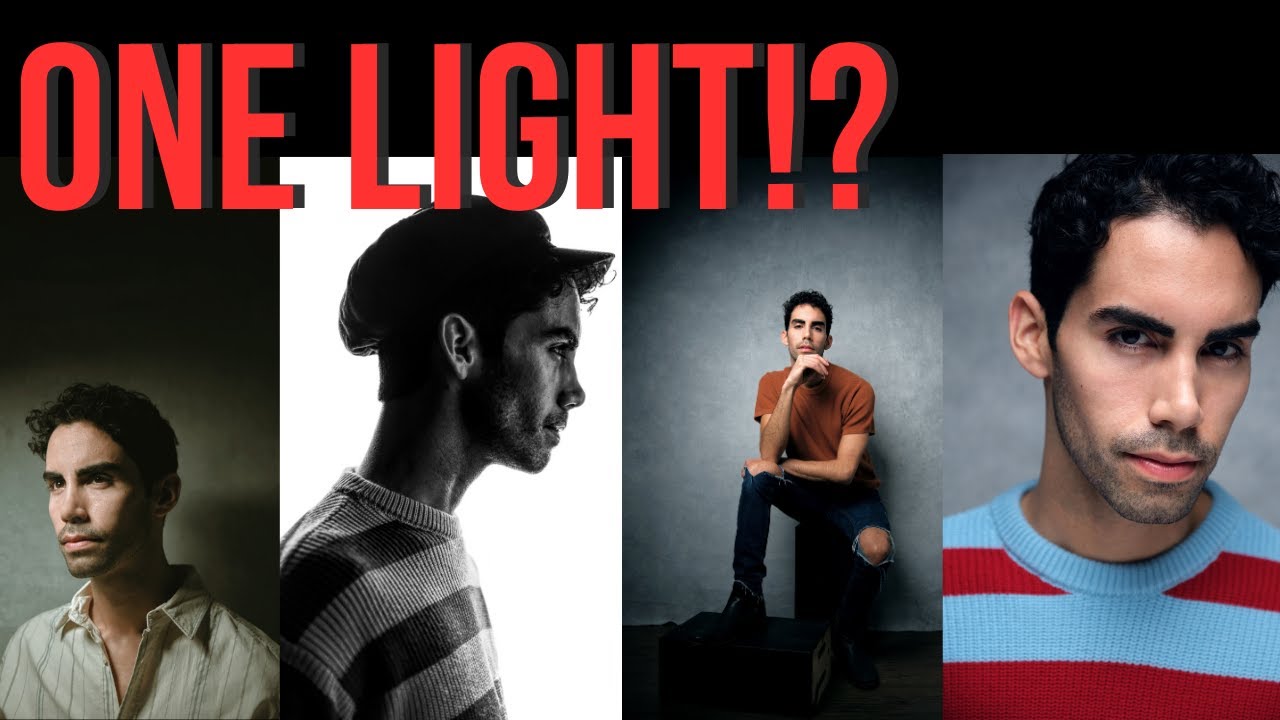
For setup 1A, Pete places the light to the left of the subject at a 45-degree angle and slightly above his eye line. He uses a black V-flat camera right and a softbox fitted with a grid to increase the shadows on the subject, giving the images a dramatic look. The grid also creates a tight circular area of light that keeps the light concentrated and prevents it from spilling onto the background. With this setup, you can take full-length portraits, three-quarter portraits, half-length portraits, and headshots without moving any lights.
In setup 1B, everything remains the same, but Pete flips around the V-flat so that the white side faces the subject. This simple change creates a massive difference in the images, as the light now bounces back onto the subject instead of being absorbed. The heavy deep shadows on the camera's right side are now much less dense, and there is more detail and subtlety in the transitions from lights to darks.
For setup number two, Pete takes the light and places it above the subject, pointing down directly at him and angled towards him. The light creates shadows under the chin, accentuating the jawline and giving results similar to using a beauty dish. However, the modifier is much larger, so the shadows are less harsh, and the overall effect is more subtle. This setup works great for full-length portraits or close-ups of the face and everything in between.
Finally, in setup three, Pete moves the light behind the subject to create a rim light. This type of lighting is perfect for adding depth and separation from the background, making the subject pop. The light spills onto the background, creating a gradient of light, and the subject is placed in front of the backdrop, allowing the shadows to play off each other.
Pete Coco’s tutorial shows that with a bit of creativity and some simple equipment, you can create various portrait looks that will impress your clients. And if you’re new to studio photography, start with a simple setup like 1B and work your way up.
Please note that at 03:40 the right photo should read "WHITE V-Flat."
Image and video via Pete Coco Photography | Website | Instagram | If you are looking to become a pro headshot photographer, check out the Headshot Crew .


0 comments:
Post a Comment