


Mastering Dramatic Portraits with Top-Down Lighting
The desire for portraits that possess depth, shape and detail often leads photographers to the dramatic technique of top-down lighting. This style is unparalleled for sculpting facial features—emphasizing the jawline and cheekbones—but it is highly dependent on precise light placement.
The difference between a striking, dimensional image and a portrait with harsh, unflattering shadows lies entirely in mastering a single critical technique: feathering the light.
The Art of Feathering the Key Light

The most common error in top-down lighting is simply positioning the key light directly overhead, which creates undesirable shadows over the eyes and chin. To achieve a smooth, flattering light falloff, a different approach is mandatory.
The modifier—a softbox or umbrella—must be placed one to two feet above the subject. Crucially, the light needs to be moved forward so that the back edge of the modifier is positioned just in front of the subject's face.
This counter-intuitive placement ensures that the full beam is allowed to feather down the subject's body. The result is a gradual transition from highlights to shadows, defining the subject's shape without causing severe undereye shadows, all within a focused, single-light setup.
Strategy for Light Backgrounds
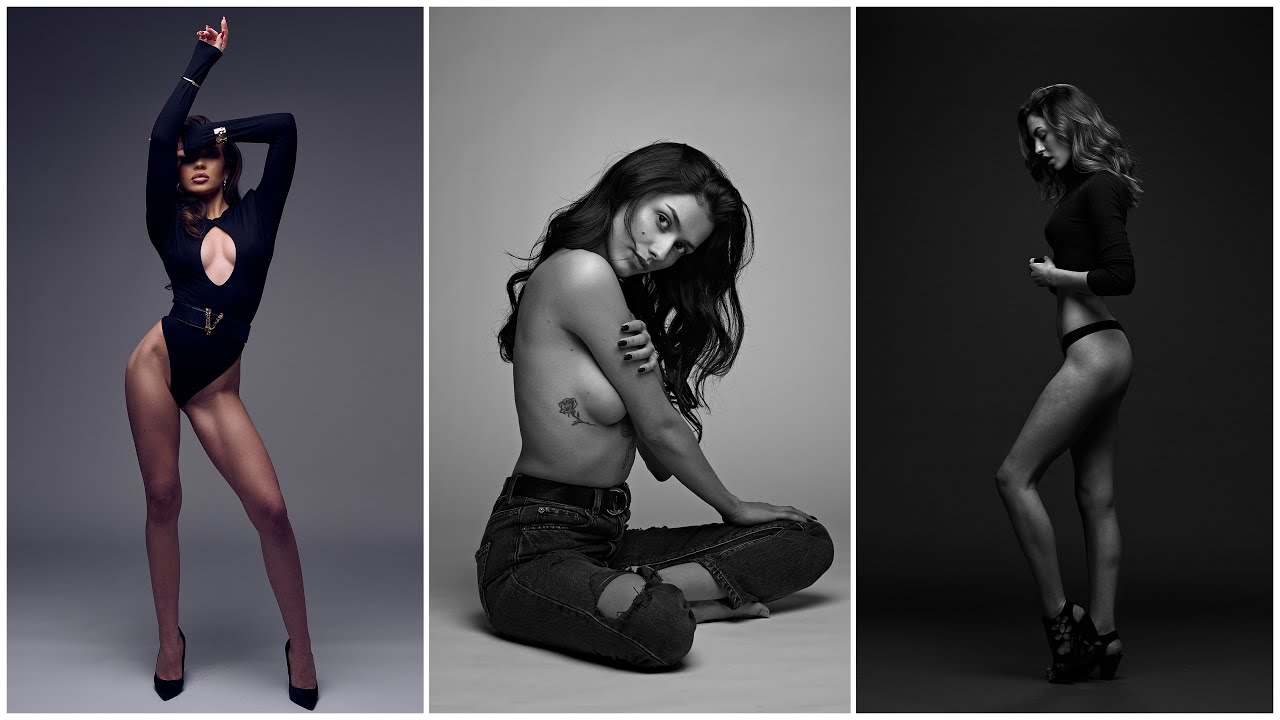
When working with a bright backdrop, controlling the tone requires thoughtful spacing. To prevent the background from blowing out and to achieve a rich, light gray tone, position the subject about five feet away from the backdrop.
This distance maximizes the effect of light falloff, naturally creating separation between the subject and the background.
For metering a portrait like this, a strong starting point is an aperture of f/8 at ISO 100 and a sync speed of 1/200th of a second.
A simple refinement when the subject is seated is to utilize the white floor as a subtle bounce card. The light reflecting from the floor fills the shadows under the chin and neck, resulting in a noticeable softening of shadows and smoother contrast transitions, all while maintaining the core top-down structure.
Advanced Separation on Dark Backgrounds
Shooting dark subjects or attire against a dark background presents the challenge of losing the subject's edges. This requires evolving from a one light setup to a two light setup to ensure clear subject separation.
The primary key light remains in the overhead feathered position. The second light, the separation light (or rim light), is indispensable here.
- Placement: The separation light must be positioned behind the backdrop.
- Aim: It should be aimed precisely toward the model's back and hair.
The vital tip is to ensure the light is angled so it does not bleed light onto the backdrop itself. This precision maintains the deep, dark background tone while illuminating the subject's outline, creating a crisp, dramatic rim of light that pulls the portrait forward and defines all the necessary detail.
Images and video via Nathan Elson


0 comments:
Post a Comment