


Mastering Flash: A Quick Guide to Perfect Strobe Exposure
Moving from ambient light to studio strobes introduces a unique challenge: you can't see the strobe exposure until the flash fires.
This uncertainty often leads to guesswork. To achieve consistent, professional results, you must understand the four primary variables that control flash brightness and the tools used for precise measurement.
The Four Pillars of Strobe Exposure
Unlike natural light, your exposure with a strobe is determined entirely by these four factors. Your shutter speed, as long as it's within your camera's sync speed (typically 1/160s to 1/250s), is irrelevant to the flash brightness.
1. Aperture (f-stop): This is your main control over both exposure and depth of field (DoF). A wider aperture (smaller number) brightens the flash exposure. Actionable Tip: Choose your aperture first based on your desired DoF (e.g., f/11 for a group shot), then adjust the other variables to set the correct brightness.
2. ISO: Controls the sensor's sensitivity. Keep this as low as possible (e.g., ISO 100 or 200) for clean images, using it only for minor exposure adjustments.
3. Strobe Power: The most direct way to control light intensity. Increase the strobe power for a brighter flash; decrease it for less light.
4. Light Distance: The closer the light is to the subject, the brighter and softer the light will be. Moving the light is a powerful way to adjust both exposure and the quality of the light.
Eliminating Guesswork with Data
Relying on the small, uncalibrated screen on the back of your camera is a quick path to inconsistency. Instead, professional photographers use data to verify exposure.
The Histogram and Gray Card Method:
The histogram graphically displays your image's tones (shadows on the left, highlights on the right). To find a reliable midtone baseline for your exposure:
- Place an 18% gray card under the same light as your subject.
- Take a test shot filling the frame with the card.
- Check the histogram: The main spike representing the gray card should fall exactly in the center (midtone range). Adjust your aperture or strobe power until the spike is centered.
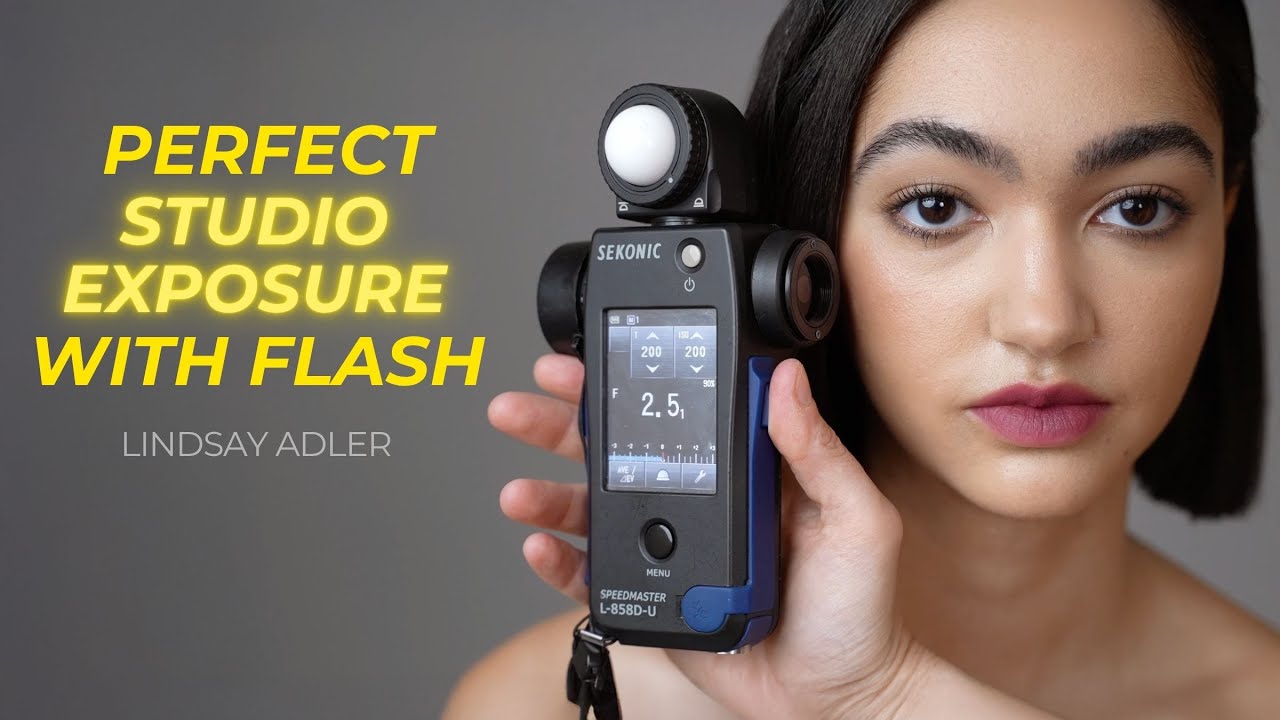
Precision with a Light Meter:
For ultimate precision and repeatability—essential for complex or multi-session shoots—the light meter is the gold standard. A light meter measures the exact amount of light falling onto your subject.
The most efficient workflow: Set your camera's desired aperture (e.g., f/8), and then adjust the strobe power up or down until the meter’s reading matches the f-stop you set on your camera.
This technique guarantees a technically correct exposure while preserving your artistic choice of aperture. Once you master these variables and tools, you gain the confidence to make intentional creative adjustments, such as slightly overexposing skin tones for a luminous effect, knowing exactly how much you are deviating from the measured baseline.
Resume
Mastering Strobe Exposure: Key Takeaways
Images and video via Adorama | Lindsay Adler| Topic | Principle | Actionable Tip |
| Exposure Variables | Aperture, ISO, Strobe Power, Light Distance control flash brightness. Shutter speed does not (within sync speed). | Prioritize Depth of Field with Aperture, then use Power/Distance to set brightness. |
| Histogram Check | The histogram visualizes tones; a correct midtone reading ensures a balanced exposure. | Use an 18% gray card to force the histogram spike to the center (midtone). |
| Light Meter Use | Provides the most precise, repeatable exposure measurement. | Set your camera's desired aperture. Adjust the strobe power until the light meter reads the exact same f-stop. |


0 comments:
Post a Comment